But first, a quick diversion regarding quality of painting.
I usually set myself three levels of painting quality: Trooper, Leader, and Showpiece. Trooper-quality is for the masses of minis that I use in wargames. For these, a good base coat with simple highlighting will give the mini a decent look, and allow painting of multiple figures at one. If they look good at arms length, I'm happy.
Leader-quality painting is for more special or unique minis. These are better painted, with more detail, and more careful shading. Most RPG character minis get this level of painting. They look good on the table, and the players are happy with them.
Showpiece-quality painting involves upping everything I do at the Leader level and adds more. I usually customize the mini, modify details, and paint as much detail as I can. I also usually paint a unique and detailed base for the figure.
This is the level I'll be painting the Killjoys at.
There are a number of tools and supplies that any mini painter uses, and like most, I have my favorites. It can be assumed that this is what I generally use. If I use different, I will note when I do.
 |
| Pledge was called Future when I made these labels |
Primers: Army Painter Undercoat
Paints: Vallejo Paints (my preferred paints)
Inks: Multiple brands, but all water or acrylic based.
Washes: Pledge Floor Care
Yes, floor polish. Why? Pledge (which used to be called Future) is pure, liquid acrylic. Acrylic is what my Vallejo paints are made of. Pledge mixes well and dries to a nice, glossy finish. That six dollar bottle has lasted me for years.
I use two mixtures of Pledge: a pure mixture as it comes out of the bottle (the bottle labeled 'Future'), and a mix of a 1 part Pledge to 1 part distilled water (called Future Wash from here on). All of my washes use these as bases, with inks or paint added as needed.
With supplies gathered and stocks made, it's time to pick the bases.
Usually, I do the traditional mount-the-mini-on-the-base-and-prime (and we'll cover that in a later project), but for the Killjoys, custom bases are a must.
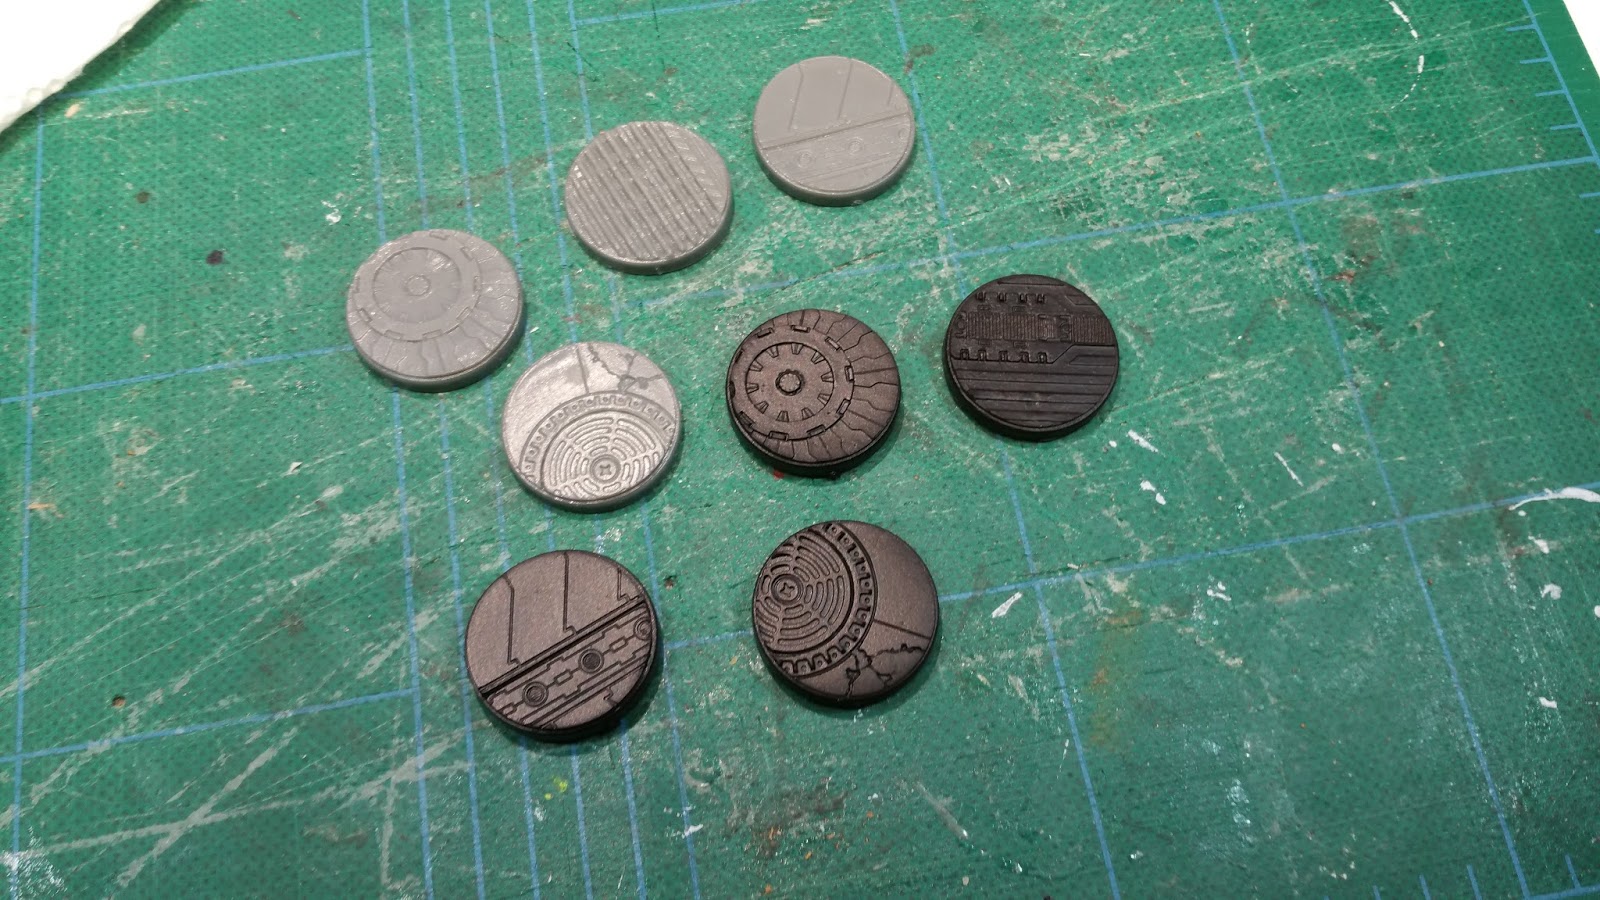 |
| Bases - raw and primed |
I picked four of them, cleaned them up (washing off release mode, filing off flash) and primed them black. I let this dry for about an hour.
 |
| White, then green wash |
The white wash is done first to provide a nice base for the glowing green color. It easily highlights the texture and details of the base and will allow the green glow to show up against the black of the base. I mixed a wash of 1 part green ink, 1 part glow-in-the-dark acrylic paint, and 4 parts of Future Wash. This was slopped onto over the bases, making sure it covered all the white from the previous step. With a dry brush, excess green wash was soaked off the raised areas. The bases were allowed to dry for another hour.
At this point, the bases are looking good, but a bit dull. Some of the ink had dried on the raised parts, and looked like an dull, oily patina. Most of this was removed with a soft cloth damp with pure Pledge. Wiping the bases gently with the cloth dissolved the patina and cleaned it off the base.
 |
| Gloss black around the edges, and moist-brushed on raised areas |
Once dried, I painted the rim with gloss black, and did a moist dry-brush over the raised areas. A moist dry-brush is like a dry-brush, but with a bit more paint on it. It deepened the black of the base and increased contrast between the glowing lines and the floor plate details.
After letting this dry for another hour, I painted a coat of pure Pledge on the base. This provides a glossy surface and a protective layer over the glow of the base.
 |
| With Pledge wash to seal in glowing goodness. Officer Testcase seems to approve |
After that, the only thing left to do is wait for the minis to come in.
No comments:
Post a Comment